Our family dollhouse was originally built by my grandfather, Ralph Holman Eggelhof. Ralph was born July 21, 1911, for his two daughters, my mother Jane and her older sister Nancy. The family of four lived in a two-bedroom ranch in Indianapolis, Indiana.
Sometime between 1948 and 1950, Ralph drew up blueprints and built a dollhouse out of ¼ " fiberwood pieces to the following measurements.
 Original dimensions of the dollhouse
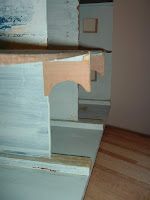
The original dollhouse was plain, unpainted, and held a single fireplace (a block of wood with an arch cut at the bottom to represent the firebox, and very little furniture, but the girls loved it and played with it endlessly. We have looked through our family photos in vain for a picture of it in its heydey, but I haven't given up hope. When the girls finally outgrew it, the dollhouse was moved to the attic to save for the future.
And then this happened:
The First Remodel
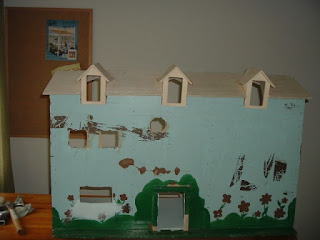
Years passed and Jane married and had three daughters, Dee (me), Christy, and Missy. As a Christmas present sometime in the early 1970s, our Aunt Nancy, who had no children of her own, pulled the dollhouse out of storage, painted it inside and out, added pictures and mirrors on some of the walls, and even threw in some furniture, and then painted large flowers around the perimeter. She wrapped it up with a big bow and gifted it to us, the second generation.
We were thrilled and played with it for years and it stayed with us through several moves. Sometime in the mid-1970s, my mother decided to add some extras. For the first time, the dollhouse received door openings between the rooms in the house and wallpaper on all of the walls. She also added lights! That was so very impressive to us and it renewed our interest in the make-believe world of the dollhouse.
And then this happened:
One night while mom and dad had company, my sisters and I were playing in the newly wired dollhouse. We had been warned to be quiet and not interrupt and we were happy to play in the dollhouse. All of a sudden, the dollhouse wiring sparked and the dollhouse started to smoke. As the oldest, I was the one who had to break the rules and interrupt my parents' visit, so I crept into the formal living room and walked up close to my mother and whispered, "Mom, the dollhouse is on fire." She screamed, jumped up, and ran into our room to unplug it. The dollhouse was only scorched, not destroyed, but it was never quite the same.
Once again, the family dollhouse was placed into storage and came along on move after move, house after house. It "survived" the fire, a flood, poor storage conditions, and a few drops which broke a side wall and damaged the roof, but we hung onto it because we knew that someday we'd restore it for the next generation.
The Great Remodel Adventure Begins
When my daughter turned 7, my mother decided to bring the dollhouse out of storage and fix it up so that her granddaughter could enjoy it as much as we all had. Little did she know the amount of time and money she was about to expend to complete this project.
The damage to the dollhouse was more extensive than she expected and the remodel requests were more elaborate than she had planned, but still, it was an adventure.
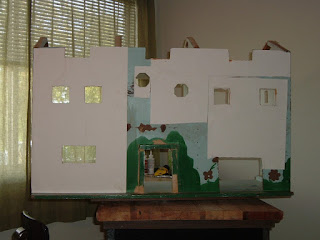
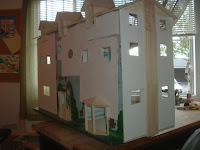
Both side walls needed to be replaced and a lot of structural reinforcements had to be tackled. She decided to add a third floor with dormers and raise the height of the original back door. My nephew requested a slide from the kids' bedroom to the playroom and my daughter requested a porch on the side. I wanted a door on the front so that I could close it to keep the inside safe from animals (and dust!). Overall, the house needed a lot of work.
To create a third floor, the first- and second-floor ceilings had to be lowered and two sets of stairs had to be added. And, for fun, the second-floor hallways was divided up to add a bathroom where one had never existed (or at least to add privacy to a bathroom that may have existed in some previous incarnation. The entire bathroom wall opens (see pics) on a hinge (see pics) so that the inside is accessible for playing. The open wall forms the door to the playroom.
The lower right-hand room has been the kitchen for all three generations of children who have played with this house. Now, it will have a porch added to the side, so we had to add a door. My aunt is a musician and every member of the family in all three generations plays at least one instrument so, of course, we added a music room. Most of us work at home so we will need an office and what home is complete without a fabulous playroom. Let's get oriented.
The third-floor is clearly lacking in height so we needed to add dormers. If nothing else, my mother is persistent--she worked on the dormers for weeks trying to get the right height and the right angles.
She added windows to every room in the house.
On the interior, she added archways between the rooms on the first-floor because they reminded her of her childhood home in Indianapolis.
The old house will get three fireplaces so a chimney is a must, and a bay window in the living room will add a little extra floor space.
Pay attention to the fireplace in the master bedroom: my grandfather made it as part of the original house he built for his daughters. We still have it and it will go into the newly remodeled version without a doubt.
In my next posts, you'll see how each room shapes up. I think you'll like the results as much as we do.
A Very Pink Playroom
For the walls, I made a wainscotting by using a base of Balsa and then cut an overlay design out of card stock and glued them together. Once they are painted white they look like a single carved piece of wood.
 Take a closer look at the pictures hanging on the wainscot. I asked my daughter and my niece to paint me a picture. They did and I miniaturized them and hung them on the wall with a mini thumbtack.
I thought it would be fun to share some of the work we did on each room of our family dollhouse restoration project. It was my first experience working with miniatures (since I was a child playing in the dollhouse) and I thoroughly enjoyed the challenge of making as many pieces of furniture and accessories as I dared.
The playroom sits directly below the children's nursery and by special request of my nephew, we included a slide from the nursery into the playroom.
Now let's see how we did it.
Everything starts with a base. In our playroom, we needed to add a hole in the corner so the kids could slide down into the playroom, and a ladder so that they could get back up into the nursery. My mother was responsible for all of the construction and lighting in the house. The posts in each corner were part of the original dollhouse construction support; the crown molding is the new structural support she added. The round-wire electrical was attached to the floors and covered with a sheet of wood flooring she found online somewhere.
I wanted a hot air balloon in the playroom so I made one out of paper mache. Since paper is flammable I didn't want to add a light inside the balloon and we chose to add a spotlight hidden behind the balloon. You can see that in the following picture.
For the walls, I made a wainscotting by using a base of Balsa and then cut an overlay design out of card stock and glued them together. Once they are painted white they look like a single carved piece of wood.
 Take a closer look at the pictures hanging on the wainscot. I asked my daughter and my niece to paint me a picture. They did and I miniaturized them and hung them on the wall with a mini thumbtack.
Because this is a playroom, the furniture is minimal. We assembled a House of Miniatures armoir that my mom found years ago and added tin panels and then filled it with store-bought goodies. I took an old round jewelry box and covered it with a fun yellow fabric to use as an ottoman. The slide is an old piece a racecar track that we had lying around. And then, I made the desk and corbels and hung a chalkboard on the wall.


This is fascinating. Keep sharing!
ReplyDelete